Blog

  • Can a Website Owner Retrieve Your Password from a Database?

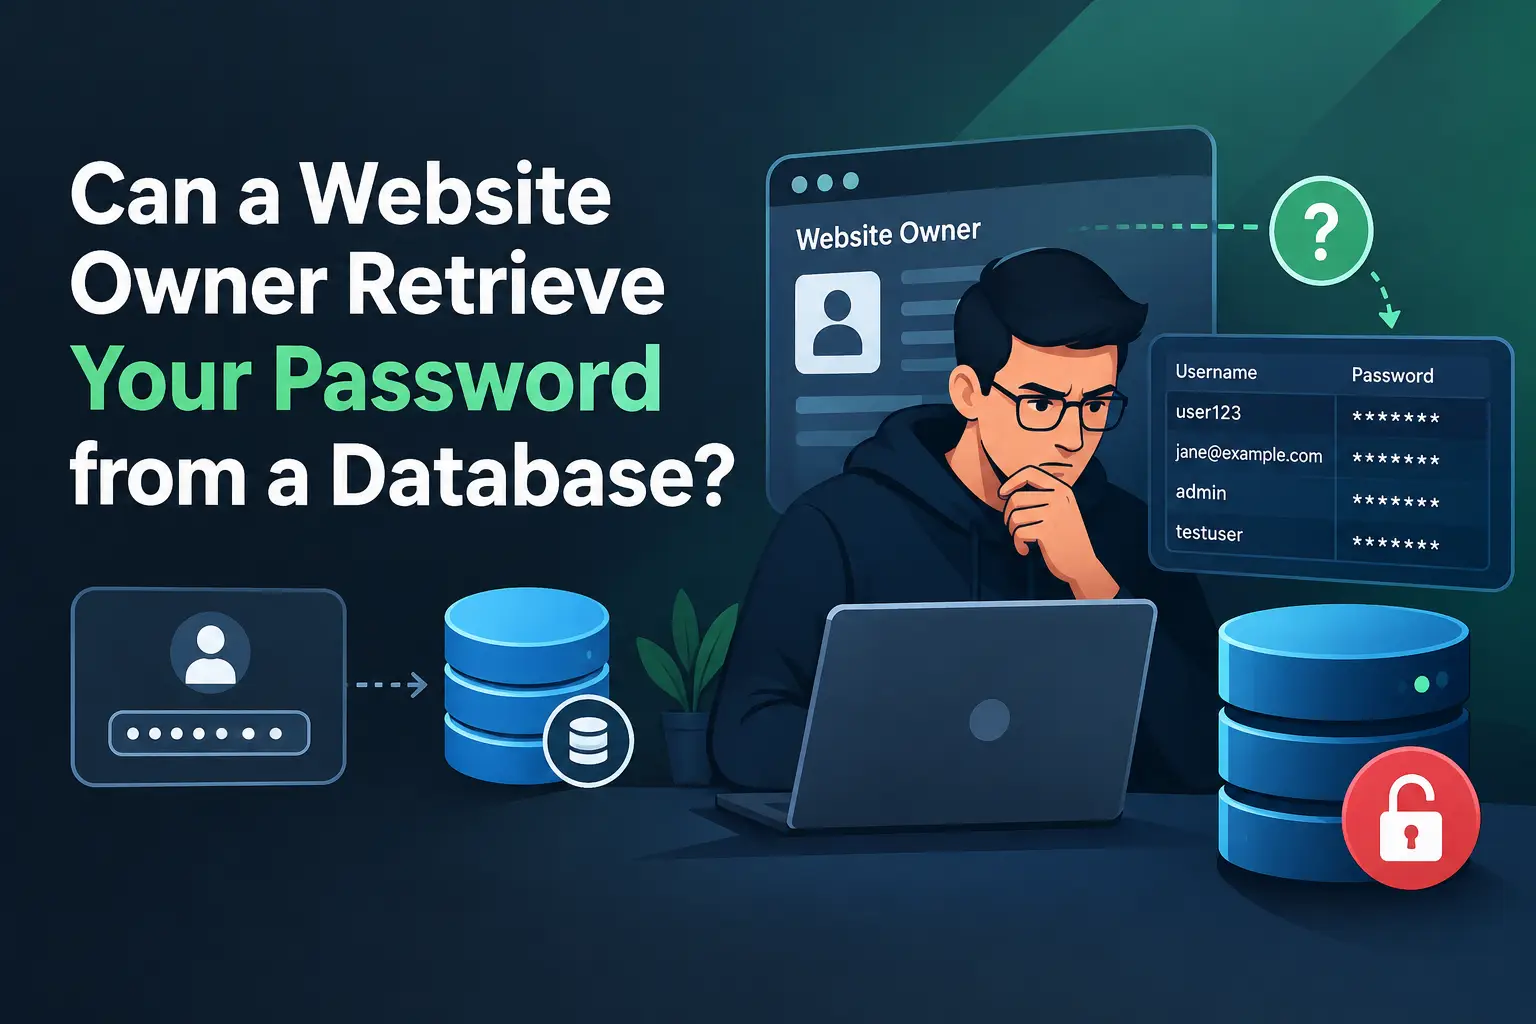
    Can a Website Owner Retrieve Your Password from a Database?

    Have you ever thought about your password after you enter it on a website and click the submit button? How does your browser send it to the websites server, and how is it stored in database? These are important questions because passwords protects our personal information and online accounts.


    When you create an account, the password is sent to the website’s backend, backend performs some processing before storing it in a the database. In a secure application the password is hashed using a suitable password hashing algorithm instead of storing the original password. In this article I will explore how passwords are stored, what is hashing and encryption, how password hashing works, and how different programming languages help developers to protect user’s passwords.

    Encryption is a process through which readable information is converted into an unreadable form so that unauthorized people cannot understand it. When you enter your password, the browser sends it to the website’s backend over a secure HTTPS connection. The backend then processes the password according to the application’s security rules.

    Example of encrypted data:

    • Original message: admin123
    • Encrypted message: x5#PQ!2@ZA

    This is just an example. Actual encrypted data depends on the encryption algorithm, the key, and the input. With the correct decryption key.

     What is Hashing?

    Hashing is a process through which a password is converted into a value called a hash. Unlike encryption, password hashing is designed to be a one-way process, which means we cannot simply reverse the hash to get the original password.

    When you create an account on a website, the backend uses a suitable password-hashing algorithm to generate a hash of your password and stores that hash in the database instead of storing the original password.

    There are two major distinctions that make hashing different from encryption:

    1. Hashing is designed to be one-way. The original password cannot simply be recovered by reversing the hash. However, attackers may guess passwords and check whether their guesses match a stolen hash.
    2. Hashing produces a hash value. Its format and length depend on the algorithm and how the result is stored. Encryption, on the other hand, produces ciphertext that can be decrypted using the correct key.

    Does every programming language use password hashing?

    Almost every programming language can hash passwords, but none of them do it for you automatically. The developer has to choose to do it.

    Think of hashing as an idea, not a feature of one language. Whether you write code in PHP, Python, Java, or JavaScript, you can use the same idea: never save the real password, save a scrambled version of it.

    How languages help

    Some languages have hashing built in. PHP is the best example, with ready-made functions called password_hash() and password_verify().

    How does hashing work?

    Hashing is like putting your password through a meat grinder. You can turn a steak into minced meat, but you can’t turn the minced meat back into a steak.

    A hash function takes any input, like your password, and turns it into a long string of random-looking characters called a hash.

    That output looks like nonsense, and there is no way to run it backwards to get “password123” back.

    Advantages of hashing

    The biggest advantage of hashing is that a website never has to keep your real password. When you sign up, the server scrambles it and saves only that scrambled version. So if a hacker breaks into the database, all they find is a pile of strange-looking text, not passwords they can actually use. And because hashing only works one way, there’s no easy trick to turn it back. Attackers have to guess passwords one at a time, and with slow algorithms like bcrypt, that can take years. It also means even the developers and admins can’t see what your password is. Login still feels normal, since the server just hashes what you type and checks if it matches. Of course, hashing won’t save a weak password like “123456”, but it makes a stolen database way less dangerous than it would be otherwise.

    Conclusion

    So, can a website owner retrieve your password from a database? If the website is built properly, no.

    A secure website never saves your real password. It saves only a hash, and because hashing works one way, the owner, the developers, and even a hacker who steals the database cannot simply turn that hash back into your password. The owner can reset your password if you forget it, but they can’t tell you what the old one was.

    The answer changes if the website is built badly. If a site stores passwords in plain text, the owner can read every one of them. If it uses encryption instead of hashing, then anyone who has the key can decrypt all the passwords. That is why hashing, and not encryption, is the right choice for storing passwords.

    Remember that your password is only as safe as the website that stores it. The server briefly sees your real password when you submit it, right before hashing it. So use strong, unique passwords, and don’t reuse the same one on different sites. Then even if one website is breached, your other accounts stay safe.
  • React Native vs Flutter: Which One Should You Pick in 2026?

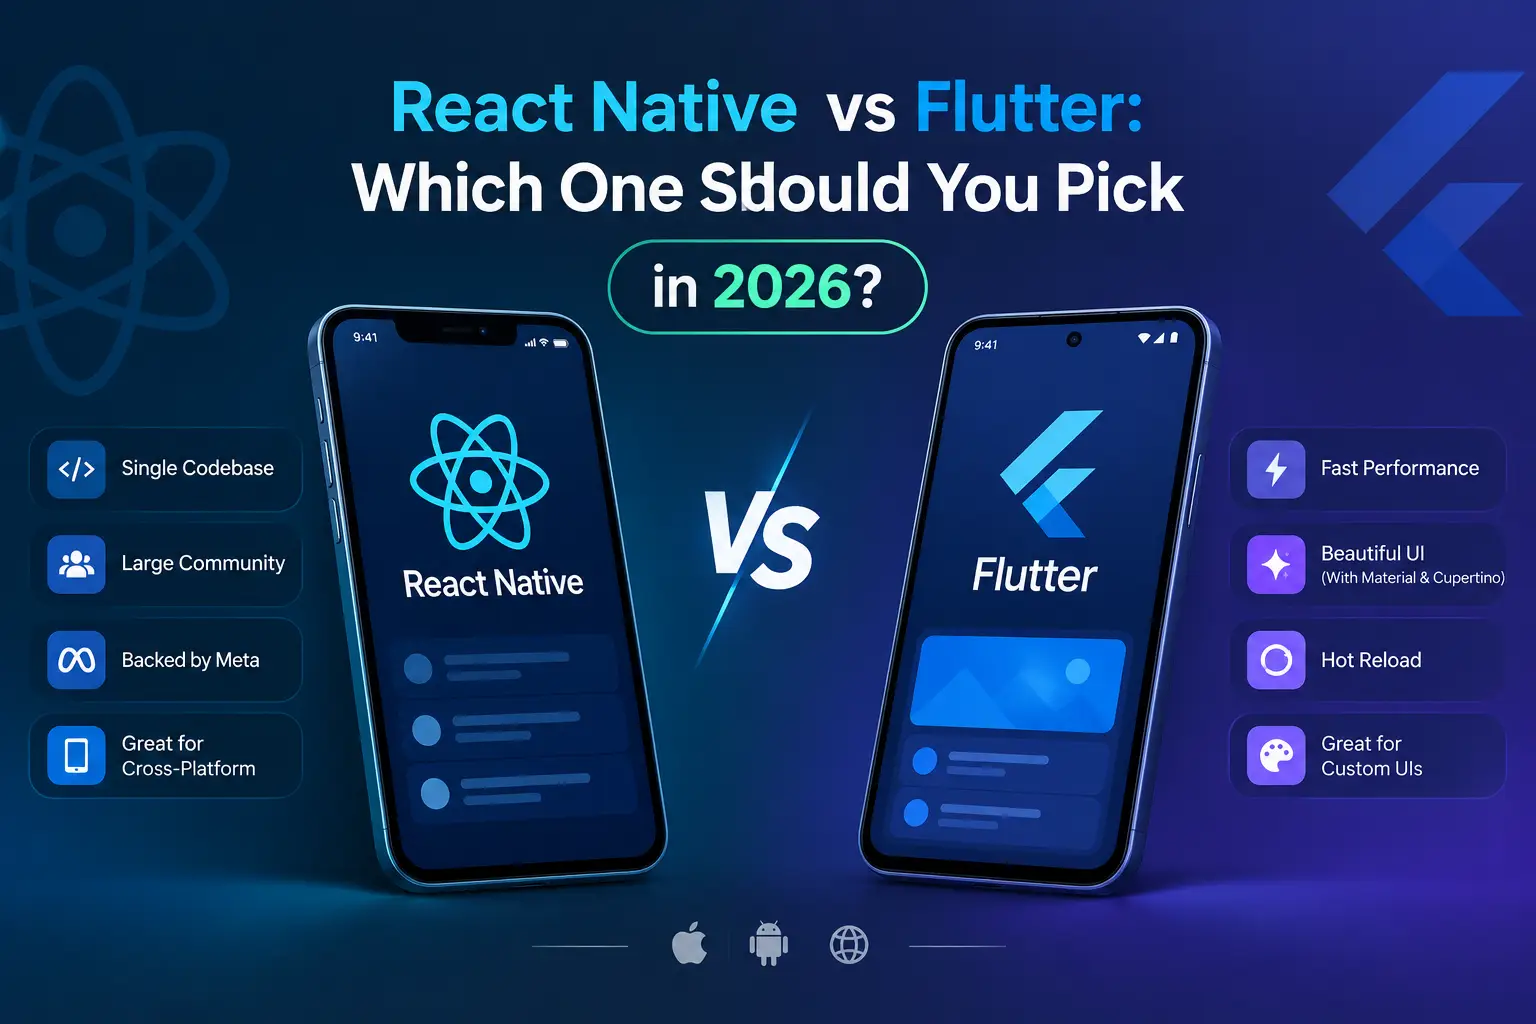
    React Native vs Flutter: Which One Should You Pick in 2026?

    If you are planning a mobile app, you have probably heard the same question over and over. Should you use React Native or Flutter? I have built apps with both, and I can tell you there is no single winner. The better choice depends on your team, your budget, and what your app needs to do.

    In this post I will explain both tools in simple words, compare them on the things that matter, and help you choose without the confusion.

    What Is React Native?

    React Native is a framework made by Meta (the company behind Facebook). It lets you build iOS and Android apps using JavaScript or TypeScript. If you already know React for the web, you will feel at home very quickly.

    The big idea is simple. You write your app once, and React Native turns your code into real native parts on each phone. A button on iPhone looks like an iPhone button, and a button on Android looks like an Android button.

    Many well known apps use it, including parts of Instagram, Shopify, and Discord.

    What Is Flutter?

    Flutter is a framework made by Google. It uses a language called Dart, which is easy to pick up if you know Java, C#, or JavaScript.

    Flutter works in a different way. It does not use the native buttons of the phone. Instead, it draws every pixel on the screen by itself using its own engine. This gives you full control over how your app looks, and it means your app looks the same on every device.

    Apps like Google Pay, BMW’s app, and Alibaba’s Xianyu use Flutter.

    Language and Learning Curve

    This is where many people make their choice.

    React Native uses JavaScript or TypeScript. These are some of the most popular languages in the world. If your team builds websites already, they can start building mobile apps with very little training.

    Flutter uses Dart. Dart is clean and friendly, but fewer people know it. Most developers learn it in a week or two, so it is not a big wall. Still, it is one more thing to learn.

    If your team is full of web developers, React Native feels easier. If you are starting fresh or hiring new people, Flutter is just as easy to learn.

    Performance

    Let me be honest here. For most apps, both are fast enough, and your users will not notice a difference.

    Flutter has a small edge in smooth animations and heavy visual screens. Because it draws everything itself, it can keep a steady frame rate even with complex designs. Its newer rendering engine has made this even better.

    React Native used to have a problem with a slow bridge between JavaScript and the native side. The newer architecture has fixed most of this. Today, React Native feels quick for normal business apps, shopping apps, social apps, and booking apps.

    If you are building a game or an app with very rich animations, lean toward Flutter. For almost everything else, performance should not decide this for you.

    User Interface and Design

    Flutter gives you a lot of freedom. You can build almost any design you imagine, and it will look the same on iOS, Android, and even the web. Designers love this.

    React Native uses the real native components of each platform, so your app feels natural to users. The downside is that sometimes you need extra work to make things look the same on both phones.

    Here is a simple way to think about it. If you want a custom, branded look that stays identical everywhere, Flutter is great. If you want the app to feel like it belongs on each phone, React Native is great.

    Development Speed

    Both tools have hot reload. This means you change your code and see the result on the screen in a second, without restarting the app. It saves a huge amount of time.

    Flutter comes with many things built in, like buttons, menus, and animations. You can build a nice looking app fast without adding many outside packages.

    React Native gives you more choices, but that also means more decisions. You will pick your own tools for navigation, state management, and styling. This can be good if you like freedom, and tiring if you do not.

    In my own work, I find Flutter faster for building a brand new app with custom screens. I find React Native faster when I am adding mobile to an existing React project.

    Community and Libraries

    React Native has been around a bit longer and has a very large community. Since it is built on JavaScript, you can use a huge number of packages from the npm world. You will almost always find a library for what you need.

    Flutter’s community is growing fast. The official package site has thousands of packages, and many are of good quality. Google also supports it strongly, so you get good docs and regular updates.

    If you ever get stuck, you will find answers for both. React Native has more old answers online. Flutter has cleaner official guides.

    Hiring and Cost

    This part matters a lot for business owners.

    There are more JavaScript developers in the world than Dart developers. That means finding React Native developers is usually easier, and you often have more choices on price.

    Flutter developers are fewer, but many of them are very focused on mobile work and do it well. In some markets, Flutter developers cost about the same as React Native developers.

    Either way, building one app for two platforms saves a lot of money compared to building two separate native apps. That is the real win, no matter which one you pick.

    Beyond Mobile

    Both tools are growing past phones.

    Flutter supports iOS, Android, web, Windows, macOS, and Linux from one codebase. The mobile side is very strong, and the others keep getting better.

    React Native focuses mostly on mobile, but you can use related tools to reach the web and desktop. If you want to share a lot of code between a React website and a mobile app, React Native gives you a natural path.

    Testing and Maintenance

    Both frameworks have good testing tools. Flutter has testing built in from the start, which makes it easy to test screens and logic.

    For long term maintenance, one thing to watch in React Native is package updates. Sometimes a library stops working after a big update, and you need to fix it. Flutter updates tend to be smoother because more things come from one place.

    This is not a deal breaker for either one. It just means you should plan time for updates, no matter what you choose.

    When to Choose React Native

    React Native is a good fit when:

    1. Your team already knows JavaScript or React.
    2. You want to share code with a web app built in React.
    3. You want the app to feel fully native on each platform.
    4. You need to hire quickly from a large pool of developers.
    5. You are adding mobile features to an existing JavaScript project.

    When to Choose Flutter

    Flutter is a good fit when:

    1. You want a very custom design that looks the same everywhere.
    2. Your app has many animations or rich visuals.
    3. You are starting from zero and do not have a strong language preference.
    4. You want one codebase for mobile, web, and desktop.
    5. You like having most tools built in and ready to use.

    My Honest Advice

    After years of building apps, here is what I tell my clients. Do not pick a framework because it is trending on social media. Pick it based on your team and your goals.

    If your people already write JavaScript every day, go with React Native. You will move faster and spend less on training. If you care most about design, smooth motion, and one look on every screen, go with Flutter.

    And remember, a good developer matters more than a good framework. A well built app in either tool will beat a messy app in the other. Spend your energy on clear planning, simple features, and a smooth experience for your users.

    Final Thoughts

    React Native and Flutter are both strong, mature, and trusted by big companies. You cannot make a terrible choice here. The best way to decide is to list your needs, look at your team, and build a small test screen in both if you have time. You will learn more in two days of testing than in two weeks of reading opinions.

    If you are still not sure which one fits your project, feel free to reach out. I am happy to look at your idea and help you pick the right path before you spend any money.

  • How to Set Up Auth for WordPress GraphQL in a Next.js Project

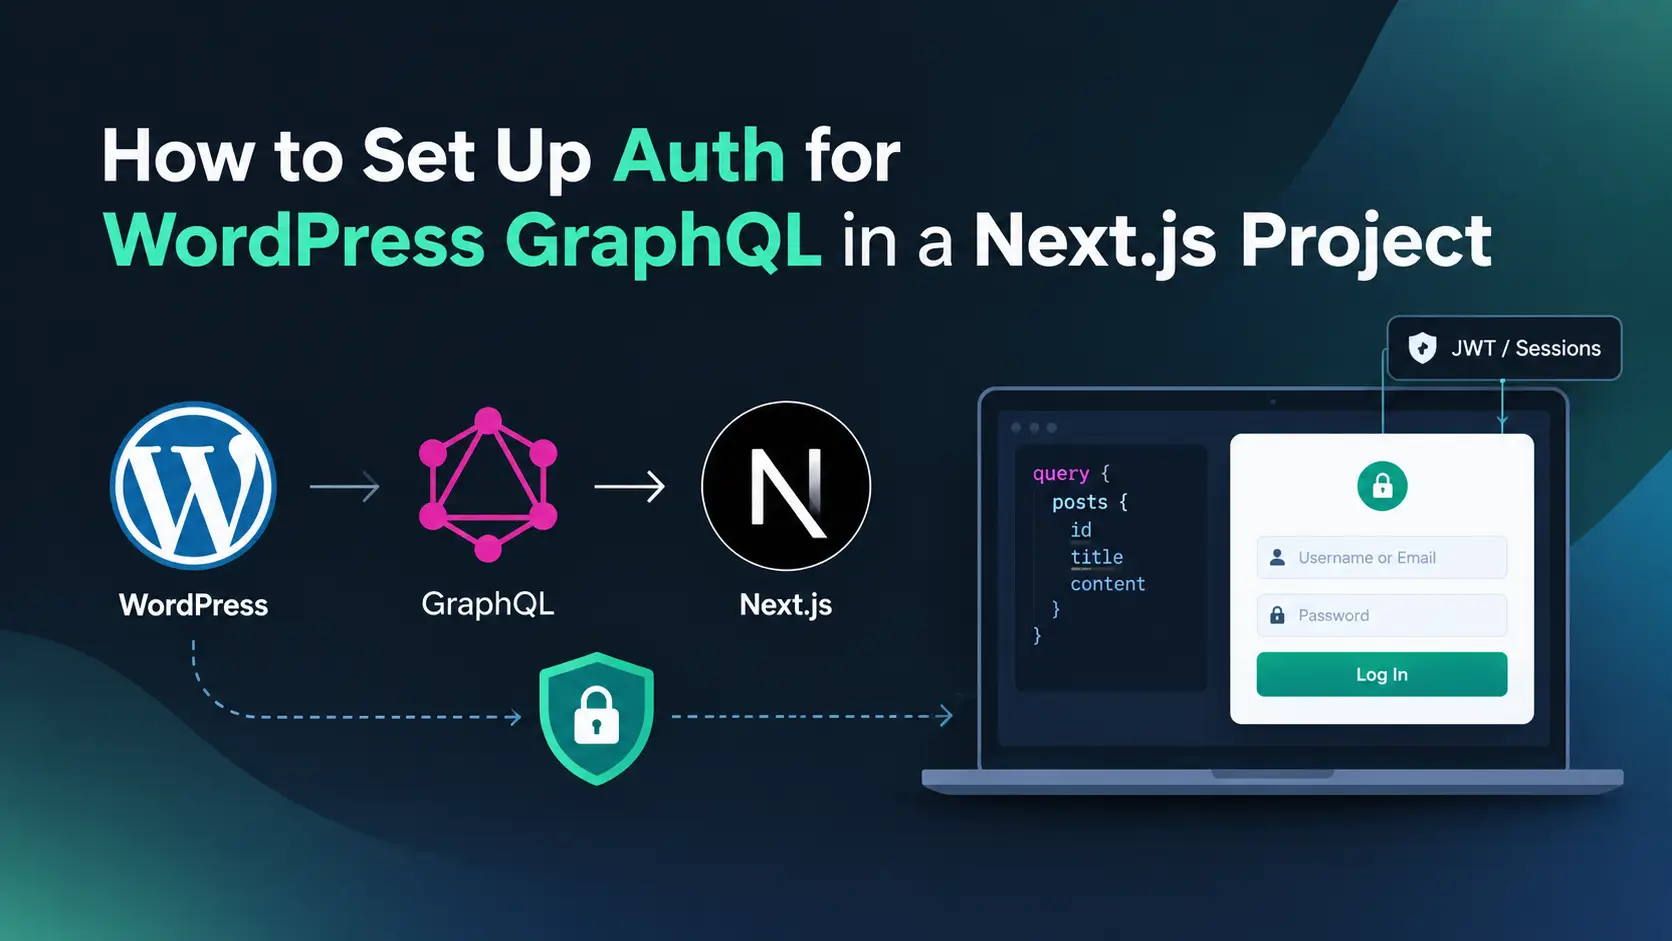
    How to Set Up Auth for WordPress GraphQL in a Next.js Project

    If you use WordPress as a headless CMS with Next.js, sooner or later you will need to fetch private data. Maybe it is draft posts, a preview page, or content only logged in users should see. Public data works without any login, but private data needs authentication.

    In this guide I will show you how to set up auth for WPGraphQL and how to use your credentials safely inside Next.js. I will keep it simple and go one step at a time.

    What You Need Before You Start

    1. A WordPress site running on HTTPS
    2. The WPGraphQL plugin installed and active
    3. A Next.js project (App Router in this guide)
    4. Basic knowledge of fetch and environment variables

    Step 1: Install and Check WPGraphQL

    In your WordPress dashboard, go to Plugins, then Add New, and search for WPGraphQL. Install it and click Activate.

    After that, you will see a new GraphQL menu in the sidebar. Your endpoint will be:

    https://yourdomain.com/graphql

    Open the GraphiQL IDE from the GraphQL menu and run a simple query to confirm everything works.

    Step 2: Create an Application Password

    This is built into WordPress. It is the easiest choice when your Next.js server needs to talk to WordPress, for example to read drafts. Think of it as your API key.

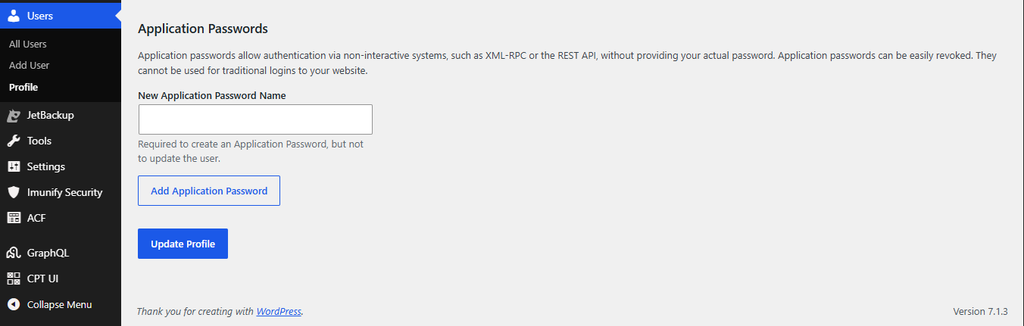
    1. In WordPress, go to Users, then Profile
    2. Scroll down to the Application Passwords section
    3. Type a name like “Nextjs Frontend”
    4. Click Add New Application Password
    5. Copy the password right away. WordPress shows it only once

    A tip from experience: create a separate user with only the role it needs, like Editor, instead of using your admin account. If the key ever leaks, the damage stays small.

    Step 4: Store the Credentials in Environment Variables

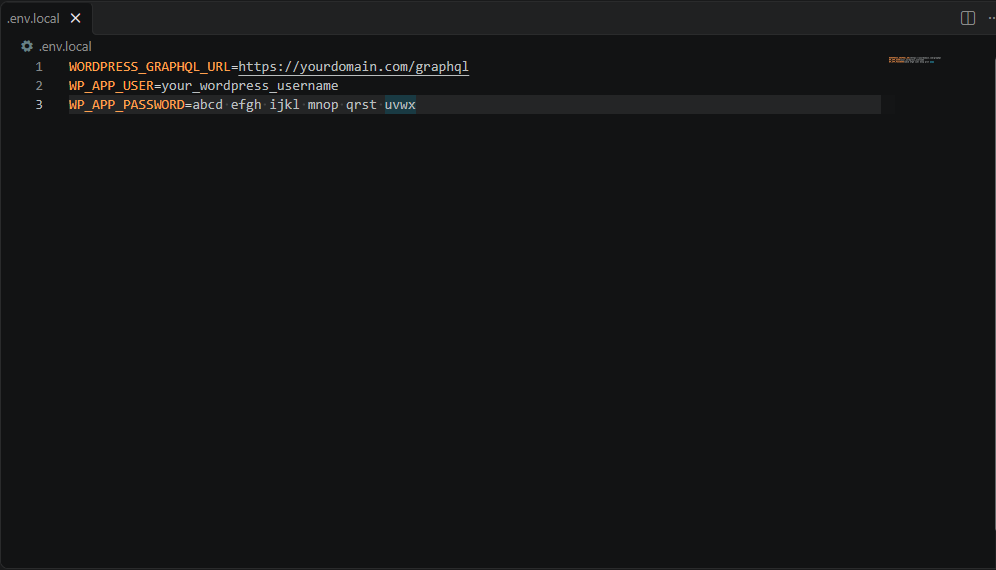
    In the root of your Next.js project, open the .env.local file and add:

    WORDPRESS_GRAPHQL_URL=https://yourdomain.com/graphql
    WP_APP_USER=your_wordpress_username
    WP_APP_PASSWORD=abcd efgh ijkl mnop qrst uvwx

    Very important: do not add the NEXT_PUBLIC_ prefix to these names. Any variable with that prefix gets sent to the browser, and anyone can see it. Without the prefix, the value stays on the server only.

    Also make sure .env.local is listed in your .gitignore file so it never goes to GitHub.

    Step 5: Create a Helper Function for API Calls

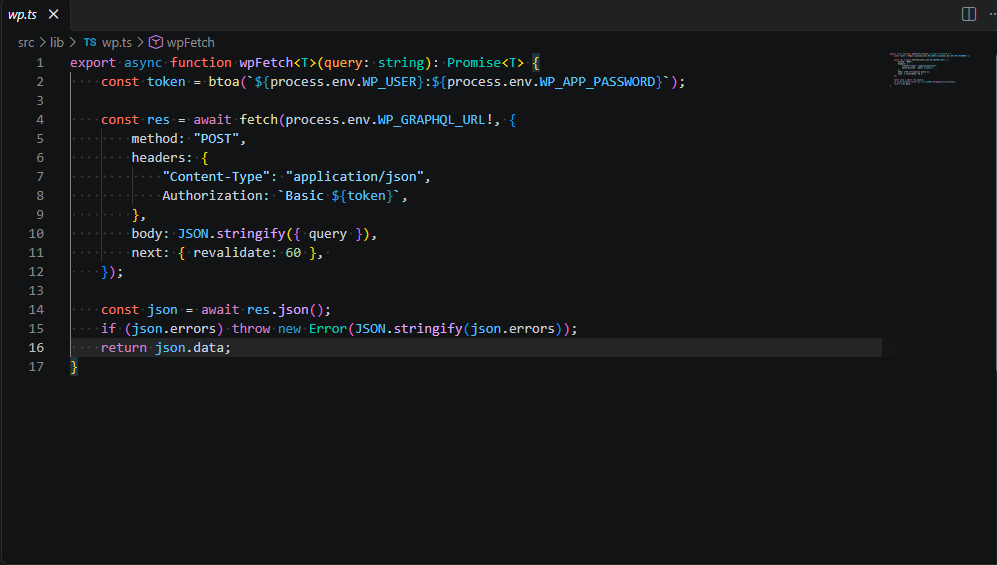
    Instead of writing the same fetch code again and again, make one helper. Create a file at lib/wp.js:

    export async function wpFetch<T>(query: string): Promise<T> {
        const token = btoa(`${process.env.WP_USER}:${process.env.WP_APP_PASSWORD}`);
    
        const res = await fetch(process.env.WP_GRAPHQL_URL!, {
            method: "POST",
            headers: {
                "Content-Type": "application/json",
                Authorization: `Basic ${token}`,
            },
            body: JSON.stringify({ query }),
            next: { revalidate: 60 }, 
        });
    
        const json = await res.json();
        if (json.errors) throw new Error(JSON.stringify(json.errors));
        return json.data;
    }

    Here is what this code does in simple words:

    1. It joins your username and application password, and turns them into a Base64 string.
    2. It sends that string in the Authorization header with the word Basic in front.
    3. WordPress reads the header, checks the user, and then returns data based on that user’s permissions.
    4. The revalidate: 60 line tells Next.js to refresh the cached data every 60 seconds.

    Step 6: Use the Helper in a Page

    Now let us fetch draft posts, which only logged in users can see. Create app/drafts/page.js:

    import { wpFetch } from "@/lib/wp";
    
    const QUERY = `
      query GetDrafts {
        posts(where: { status: DRAFT }) {
          nodes {
            id
            title
            slug
          }
        }
      }
    `;
    
    export default async function DraftsPage() {
      const data = await wpFetch(QUERY);
      const posts = data.posts.nodes;
    
      return (
        <main>
          <h1>Draft Posts</h1>
          {posts.map((post) => (
            <p key={post.id}>{post.title}</p>
          ))}
        </main>
      );
    }

    This is a Server Component, so the API call runs on the server. Your password never reaches the browser. If you run the same query without the auth header, WordPress returns an empty list. With the header, you see your drafts. That is how you know auth is working.

    Common Mistakes to Avoid

    1. Using NEXT_PUBLIC_ on secret values
    2. Using an admin account when an Editor account is enough
    3. Running your site on HTTP. Application Passwords need HTTPS on live sites
    4. Forgetting to add .env.local to .gitignore
    5. Calling private queries from client components, which exposes your keys

    Final Thoughts

    Setting up auth for WordPress GraphQL is not hard once you know the flow. Create an application password, keep it in a server only environment variable, send it in the Authorization header, and always make private calls from the server side of Next.js. If you need user logins, add JWT on top.

    I hope this guide saved you some time. If you get stuck on any step, leave a comment and I will try to help.

  • Why Cookies Stop Working After You Deploy a MERN App (And How to Fix It)

    Why Cookies Stop Working After You Deploy a MERN App (And How to Fix It)

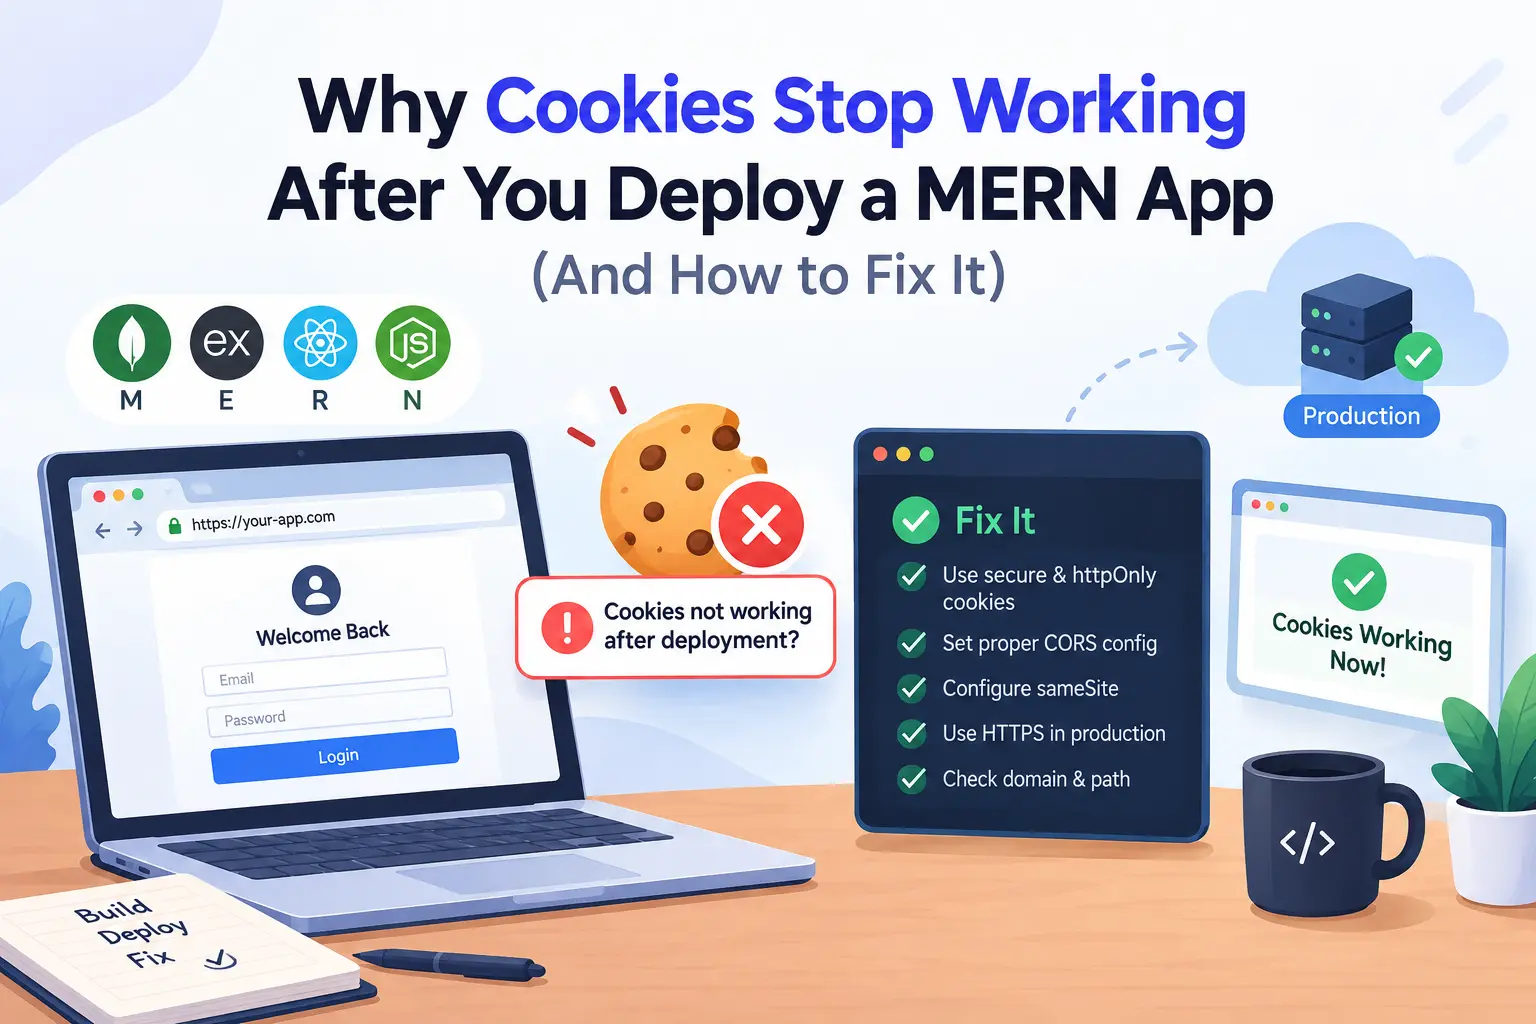
    You build a login system. It works perfectly on your laptop. Then you deploy the React app to Vercel and the Express API to Render, and suddenly nobody can stay logged in. The login request returns 200, but the next request returns 401.

    If your MERN cookies are not working in production, you are not alone. This is one of the most common problems after a first deployment. The good news is that it always comes down to a few settings. In this post I will show you why it happens and how I fix it step by step.

    Why cookies work on localhost but not in production

    On your machine, the frontend runs on localhost:5173 and the backend runs on localhost:5000. Browsers do not care about ports when they decide if two URLs are on the same site. So both are the same site, and cookies flow freely.

    After deployment, your URLs look like this:

    • Frontend: myapp.vercel.app
    • Backend: myapp-api.onrender.com

    These are two different sites. Both vercel.app and onrender.com are on the public suffix list, so every project under them counts as its own site. Now your API cookie is a third-party cookie, and browsers treat it very differently.

    How to check what is broken

    Before you change any code, open DevTools and look at two things:

    1. Go to the Network tab, click your login request, and check the response headers for Set-Cookie.
    2. Go to the Application tab, open Cookies, and see if your cookie was saved.

    Here is how to read what you see:

    What you seeLikely cause
    No Set-Cookie header at allWrong secure setting, missing trust proxy, or a CORS block
    Set-Cookie has a warning iconSameSite=None is used without Secure, or the browser blocked it
    Cookie is saved but not sent on the next requestwithCredentials is missing on the client
    CORS error that mentions credentialsWildcard origin or credentials: true is missing

    Step 1: Set the right cookie options on the server

    For a cross-site setup, your cookie needs HttpOnly, Secure and SameSite=None. I keep these in one file so login and logout always use the same values.

    // utils/cookieOptions.js
    const isProd = process.env.NODE_ENV === "production";
    
    export const authCookieOptions = {
      httpOnly: true,
      secure: isProd,
      sameSite: isProd ? "none" : "lax",
      path: "/",
      maxAge: 7 * 24 * 60 * 60 * 1000, // 7 days
    };

    Browsers reject SameSite=None if the cookie is not also Secure. That is why I only turn it on in production. On localhost over plain HTTP, lax works fine.

    Also make sure NODE_ENV is really set to production on your hosting dashboard. If it is missing, your app will silently use the development values.

    Now use the options in your login controller:

    import jwt from "jsonwebtoken";
    import { authCookieOptions } from "../utils/cookieOptions.js";
    
    export const login = async (req, res) => {
      // check email and password first, then:
      const token = jwt.sign({ id: user._id }, process.env.JWT_SECRET, {
        expiresIn: "7d",
      });
    
      res.cookie("token", token, authCookieOptions);
      res.status(200).json({ message: "Login successful" });
    };

    If you still need to set up your database layer, read my guide on how to connect MongoDB with Node.js using Mongoose.

    Step 2: Tell Express to trust the proxy

    Render, Railway and most hosts put a proxy in front of your app. The proxy handles HTTPS, then passes plain HTTP to Express. Because of this, Express may think the request is not secure, and libraries like express-session will refuse to set a secure cookie.

    Fix it with one line, placed before your other middleware:

    app.set("trust proxy", 1);

    This tells Express to read the X-Forwarded-Proto header from the proxy, so req.secure becomes true.

    Step 3: Set up CORS with credentials

    Your API must allow your exact frontend origin and allow credentials. This is the full server setup:

    import express from "express";
    import cors from "cors";
    import cookieParser from "cookie-parser";
    
    const app = express();
    
    app.set("trust proxy", 1);
    
    app.use(
      cors({
        origin: process.env.CLIENT_URL, // https://myapp.vercel.app
        credentials: true,
      })
    );
    
    app.use(express.json());
    app.use(cookieParser());

    These are the mistakes I see most often:

    • Using origin: "*" together with credentials: true. Browsers reject this.
    • Adding a trailing slash, like https://myapp.vercel.app/. The origin must match exactly.
    • Forgetting to add CLIENT_URL in the hosting dashboard.
    • Placing cors() after your routes instead of before them.

    Step 4: Send credentials from the frontend

    Even if the server is perfect, the browser will not send cookies unless you ask it to. With Axios, set withCredentials once on your instance:

    // src/lib/api.js
    import axios from "axios";
    
    export const api = axios.create({
      baseURL: import.meta.env.VITE_API_URL,
      withCredentials: true,
    });

    With the Fetch API, use credentials: "include":

    fetch(`${import.meta.env.VITE_API_URL}/auth/me`, {
      credentials: "include",
    });

    If you are still on Create React App and import.meta.env does not work for you, see my guide on migrating a MERN app from CRA to Vite.

    Step 5: Clear the cookie on logout the right way

    A cookie is only removed if the clear options match the options used to set it. Do not pass maxAge when clearing, because it can stop the cookie from being deleted.

    import { authCookieOptions } from "../utils/cookieOptions.js";
    
    export const logout = (req, res) => {
      const { maxAge, ...clearOptions } = authCookieOptions;
    
      res.clearCookie("token", clearOptions);
      res.status(200).json({ message: "Logged out" });
    };

    The problem that config alone cannot fix: blocked third-party cookies

    You can do everything above and still see broken logins for some users. Safari blocks third-party cookies by default. Firefox isolates them per site. Chrome blocks them in Incognito mode and when users turn on the setting.

    So a cross-site cookie setup works for you in Chrome, then fails for a client on an iPhone. This is why I do not rely on cross-site cookies for real projects. There are three better options.

    Option 1: Use one domain for both apps (best option)

    Put your frontend and backend on subdomains of the same domain:

    • app.yourdomain.com for the frontend
    • api.yourdomain.com for the backend

    These are the same site, so the browser treats your cookie as first-party. You can then use sameSite: "lax" and it works in every browser. Both Vercel and Render support custom domains.

    Option 2: Proxy API calls through Vercel

    If you cannot use a custom domain yet, use Vercel rewrites. The browser talks only to your Vercel domain, and Vercel forwards the request to your API. Add this to vercel.json:

    {
      "rewrites": [
        {
          "source": "/api/:path*",
          "destination": "https://myapp-api.onrender.com/api/:path*"
        }
      ]
    }

    Then set VITE_API_URL=/api in your frontend environment. Every request now looks same-origin, and the cookie becomes first-party. One thing to know: this works for normal REST calls, but WebSocket connections need to go straight to the backend, so real-time features can still run into cookie problems.

    Option 3: Add the Partitioned attribute (CHIPS)

    CHIPS (Cookies Having Independent Partitioned State) lets a cross-site cookie work in supporting browsers, as long as it is stored per top-level site. You add one option:

    res.cookie("token", token, {
      ...authCookieOptions,
      partitioned: true,
    });

    It needs secure: true and sameSite: "none", and you should use a recent Express version. It mainly helps Chromium browsers, and it does not solve the Safari problem. I treat it as a backup, not the main fix.

    Do not forget CSRF

    When you use SameSite=None, you lose some of the built-in protection against CSRF attacks. If your app changes data with cookie auth, add a CSRF token, or at least check the Origin header on write requests. Using a same-site setup like Option 1 avoids this problem entirely.

    Quick checklist

    Run through this list before you spend hours debugging:

    • NODE_ENV is set to production on the server
    • Cookie has httpOnly: true, secure: true and sameSite: "none" in production
    • app.set("trust proxy", 1) is added before other middleware
    • CORS uses the exact frontend URL, with no trailing slash and no *
    • CORS has credentials: true
    • Axios has withCredentials: true, or Fetch has credentials: "include"
    • Logout uses the same cookie options, without maxAge
    • Tested in Safari and in a Chrome Incognito window
    • Considered a custom domain or a Vercel proxy

    If your auth check runs through TanStack Query and you see stale data after login or logout, my post on common React Query issues and invalidate queries will help.

    Frequently Asked Questions

    Why do my cookies work in Postman but not in the browser?

    Postman does not enforce SameSite rules or CORS. It only proves your API logic works. Browsers add extra security checks, so a request can pass in Postman and still fail in the browser.

    Should I use localStorage instead of cookies?

    It avoids the cross-site problem, but any script on your page can read localStorage, so an XSS bug can leak the token. An HttpOnly cookie is safer for auth tokens. I prefer to fix the cookie setup instead of moving the token to localStorage.

    Does SameSite=Strict work when the frontend and backend are on different domains?

    No. Strict blocks the cookie on all cross-site requests. For separate domains you need None, or better, move both apps under one parent domain and use Lax.

    Why does my cookie disappear only on iPhones?

    Safari blocks third-party cookies by default. The fix is to make your API same-site with a custom domain or a proxy, not to change cookie flags.

    Final thoughts

    Most MERN cookie problems in production come from one idea: on localhost your apps share a site, and after deployment they do not. Set the correct cookie flags, trust the proxy, configure CORS with credentials, and send credentials from the client. Then, for a setup that works in every browser, move your frontend and API under the same domain.

    If you want help with authentication, deployment or a full build, take a look at my MERN stack development service and Node.js backend development service. You can also see my past projects, read more on the blog, or contact me directly.

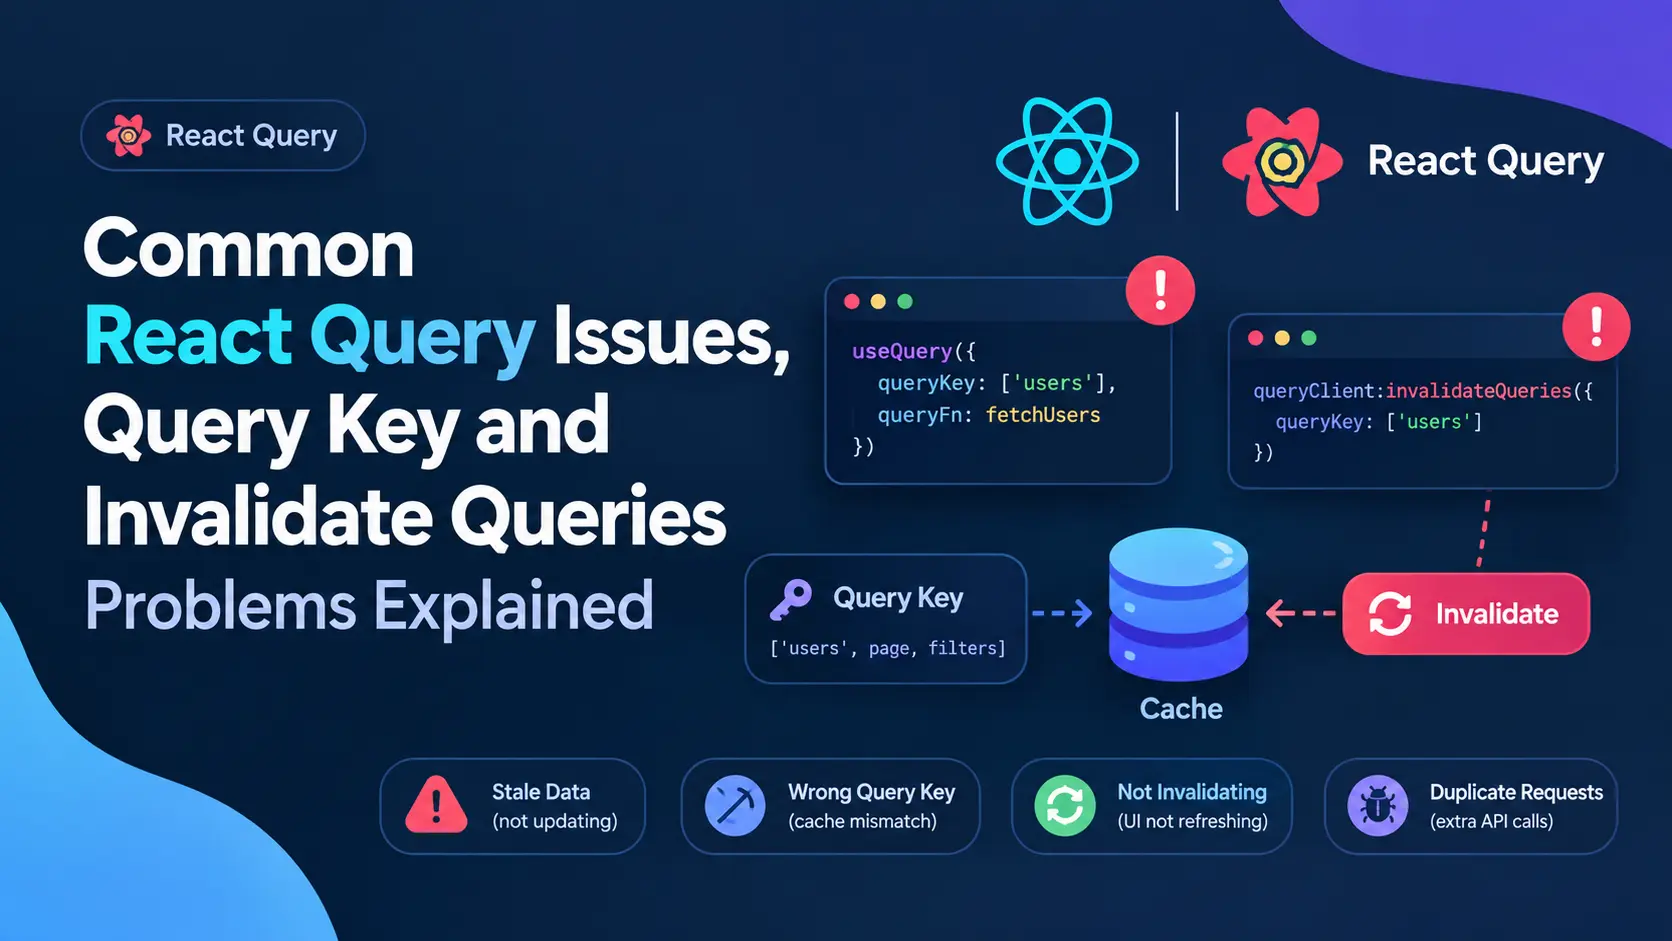
  • Common React Query Issues, Query Key and Invalidate Queries Problems Explained

    Common React Query Issues, Query Key and Invalidate Queries Problems Explained

    React query fixes a lot of problems that come with useEffect based fetching, i already wrote about that in my last post. But once you start using it in real projects you run into a new set of issues, mostly around query keys and invalidation. Most of these bugs happen not because react query is broken, but because the query key was not passed correctly.

    In this post im going through the most common issues i faced and how i fixed them, with actual code examples for pagination, update and delete cases.

    The Root Cause, Query Keys Not Matching

    React query uses query keys to decide what data belongs to what. If your key doesnt match exactly, invalidation just silently fails, no error, no warning, it just wont refetch and you spend an hour wondering why.

    Here is a mistake i see a lot.

    // fetching data
    useQuery(['users', page], () => fetchUsers(page));
    
    // trying to invalidate later
    queryClient.invalidateQueries(['users']);

    This actually works fine because react query does partial matching by default, ['users'] will match ['users', page] too. But the problem starts when people do something like this.

    useQuery(['users', { page: page, filter: filter }], fetchUsers);
    
    queryClient.invalidateQueries(['users', { page: 1 }]);

    Now this wont match properly because the object in the key is different, react query compares keys deeply but the shape has to line up close enough, and a lot of devs pass half the params during invalidate which just doesnt match the original key structure. Always keep your key structure consistent, dont randomly leave out params when invalidating.

    Case 1, Pagination Query Not Refetching After Invalidate

    This is probably the most common issue people ask me about. You have a paginated list, you invalidate the query after some action, but only the current page refetches or sometime nothing happens at all.

    const { data } = useQuery(
      ['users', page],
      () => fetchUsers(page)
    );

    If you only call queryClient.invalidateQueries(['users']) this should actually invalidate all pages since react query matches by prefix. But if somewhere else in your app you fetch users with a slightly different key, like ['usersList', page] in one component and ['users', page] in another, invalidate wont touch both. Keep one single source of truth for your keys, i usually make a small keys file for this.

    export const userKeys = {
      all: ['users'],
      list: (page) => ['users', page],
      detail: (id) => ['users', id, 'detail'],
    };

    Now everywhere i fetch or invalidate i use this same function, no typos, no mismatch.

    Case 2, Invalidating Pagination and Detail Query After Update

    Let say you have a user detail page and a user list page with pagination. User updates their profile from detail page, now you need both the detail query and the list query to reflect new data.

    const updateUser = useMutation({
      mutationFn: (data) => updateUserApi(data),
      onSuccess: (_, variables) => {
        queryClient.invalidateQueries({ queryKey: userKeys.detail(variables.id) });
        queryClient.invalidateQueries({ queryKey: userKeys.all });
      },
    });

    Notice i invalidate the detail query with the exact id, and the list query using the base key userKeys.all which is ['users']. Since this is a prefix of ['users', page], all pages of the paginated list get invalidated too, no matter what page number they are on. This is the part people usually miss, they only invalidate the current page key like ['users', 1] and forget the user might be sitting on page 3 when the update happened.

    Case 3, Delete Should Invalidate the List, Not the Detail

    When you delete something, there is no detail query left to invalidate really, the item is gone. What you need is to refresh the list so the deleted item disappears from pagination.

    const deleteUser = useMutation({
      mutationFn: (id) => deleteUserApi(id),
      onSuccess: () => {
        queryClient.invalidateQueries({ queryKey: userKeys.all });
      },
    });

    One thing to watch here, if you are on the last page of pagination and you delete the last item on that page, invalidate alone wont fix an empty page issue, you might need to also check if current page has data after refetch and move user back a page if its empty. Thats more of a ui logic thing but it trips people up because they assume invalidate handles everything automatically.

    Cache Issues I Ran Into

    Stale data showing up for a second before refetch This happens because react query shows cached data first then refetches in background. Its actually expected behavior, not a bug, but if you dont want any stale flash you can set staleTime: 0 for that specific query, though this brings back extra network calls so use it carefully.

    Refetch on window focus causing unwanted calls By default react query refetches when user switches back to the tab. On some pages this is not needed, specially if data rarely changes, you can turn it off per query.

    useQuery(['users', page], () => fetchUsers(page), {
      refetchOnWindowFocus: false,
    });

    Old cache showing after logout and login with different user This one bit me once. If you dont clear the query client on logout, next user sometime sees cached data from previous user for a split second. Fix is simple, just call queryClient.clear() on logout.

    const handleLogout = () => {
      queryClient.clear();
      logoutUser();
    };

    Final Thoughts

    Most react query problems i debugged over time werent actually about the library, they were about query keys not being consistent across the app. Once you centralize your keys and understand how prefix matching works for invalidation, most of these invalidate issues go away on their own.

    If you’re working on a react or next js project and running into similar caching or invalidation bugs, feel free to reach out, i work as a full stack mern and next js developer and i deal with these exact issues regularly while building dashboards and saas platforms. You can check my work at Mern Stack Developer Project.

  • How to Migrate a MERN App from CRA to Vite (Step-by-Step Guide)

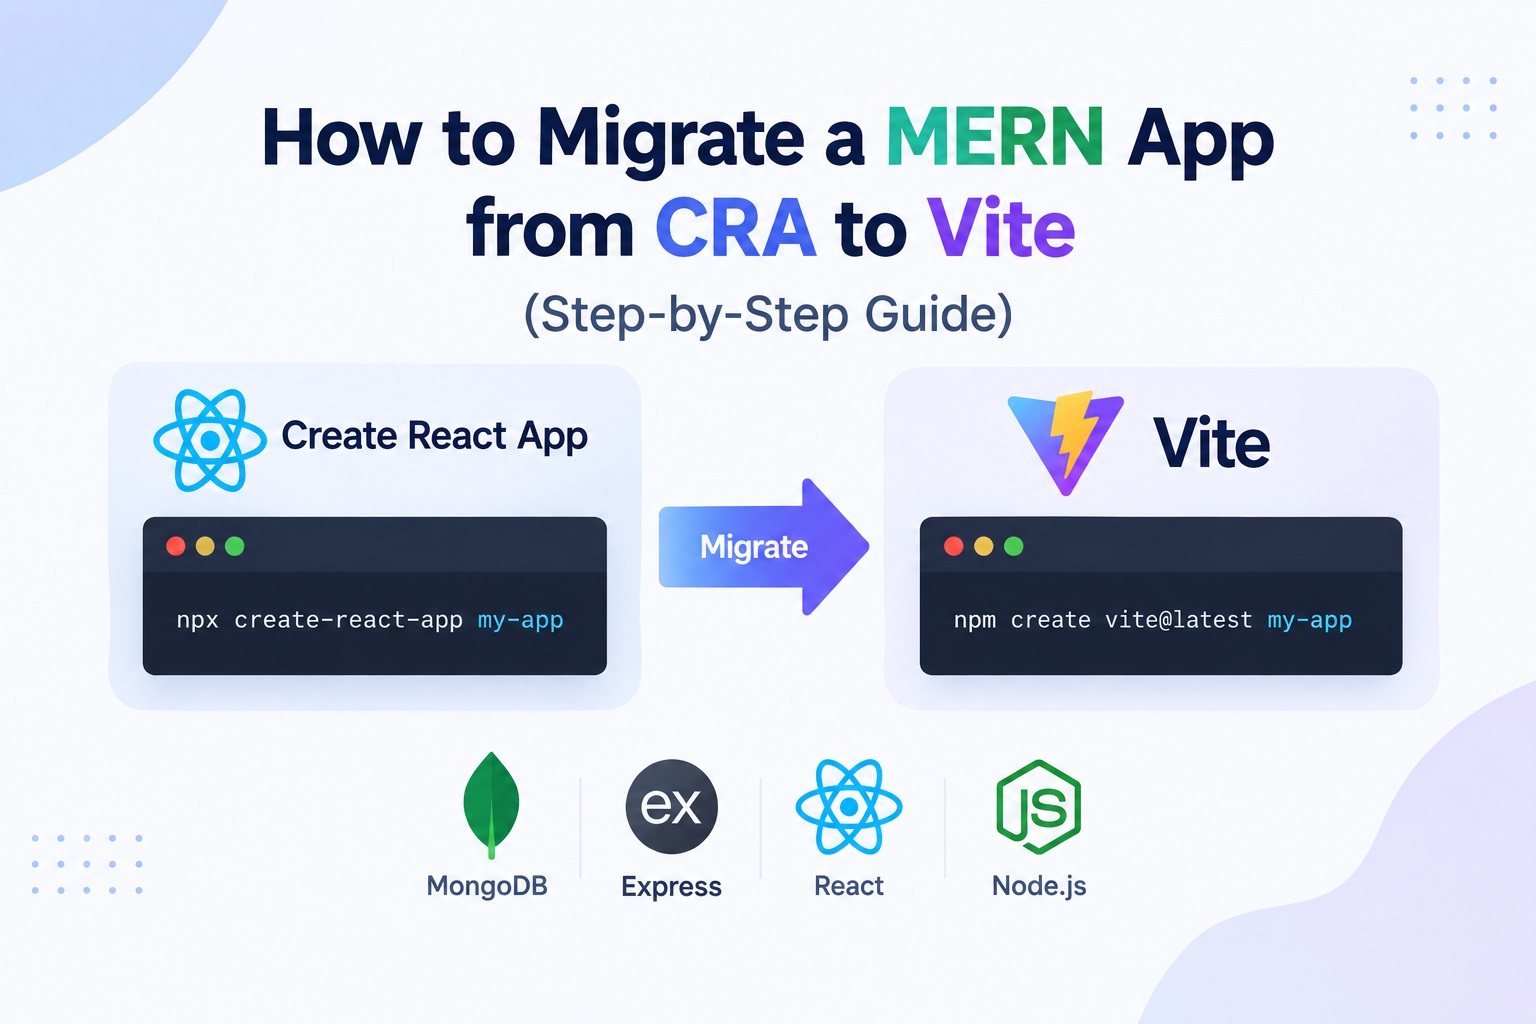
    How to Migrate a MERN App from CRA to Vite (Step-by-Step Guide)

    If your MERN stack app still runs on Create React App (CRA), it’s time to migrate. CRA has been officially deprecated by the React team, hasn’t received a major update in years, and its Webpack-based build process is painfully slow compared to modern tooling. Vite, on the other hand, gives you near-instant hot module replacement (HMR), dramatically faster cold starts, and a leaner, more modern development experience.

    In this guide, I’ll walk you through migrating a real MERN application (MongoDB, Express, React, Node.js) from CRA to Vite, step by step, with all the code you need.

    Why Migrate from CRA to Vite?

    Before diving in, here’s why this migration is worth your time:

    • Speed: Vite uses native ES modules during development, so your dev server starts in milliseconds instead of seconds, and HMR updates are nearly instant even on large
    • CRA is deprecated: The React team removed CRA from the official “Start a New React Project” docs, meaning it no longer receives active support.
    • Smaller, faster production builds: Vite uses Rollup under the hood for optimized, tree-shaken builds.
    • Better developer experience: Native TypeScript support, easier plugin configuration, and no more “ejecting” to customize your build.

    Prerequisites

    Before starting, make sure you have:

    • Node.js 18+ installed
    • A working CRA-based MERN app (with a /client or /frontend folder for React and a separate /server or /backend for Express)
    • Your project under version control (create a new branch for this migration, you’ll want to compare against the original)

    Step 1: Create a Migration Branch

    git checkout -b migrate-to-vite

    Always migrate on a separate branch. Build tooling changes can break things in subtle ways, and you want an easy rollback path.

    Step 2: Remove CRA and Install Vite

    Inside your React app’s folder (e.g., /client):

    npm uninstall react-scripts
    npm install vite @vitejs/plugin-react --save-dev

    If you’re using TypeScript:

    npm install @vitejs/plugin-react-swc --save-dev

    Step 3: Move index.html

    CRA keeps index.html inside public/. Vite expects it at the project root.

    mv public/index.html ./index.html

    Then update it, remove the %PUBLIC_URL% placeholders and add a module script pointing to your entry file:

    <!DOCTYPE html>
    <html lang="en">
      <head>
        <meta charset="UTF-8" />
        <link rel="icon" href="/favicon.ico" />
        <meta name="viewport" content="width=device-width, initial-scale=1.0" />
        <title>My MERN App</title>
      </head>
      <body>
        <div id="root"></div>
        <script type="module" src="/src/main.jsx"></script>
      </body>
    </html>

    Note the %PUBLIC_URL% references are gone — with Vite, static assets in public/ are referenced from the root path (/) directly.

    Step 4: Rename Your Entry File

    Vite requires .jsx (or .tsx) extensions for files containing JSX. Rename your entry point:

    mv src/index.js src/main.jsx

    Do the same for any other .js file that contains JSX, Vite’s default config won’t parse JSX inside plain .js files.

    Step 5: Create vite.config.js

    At the root of your React app:

    import { defineConfig } from 'vite';
    import react from '@vitejs/plugin-react';
    
    export default defineConfig({
      plugins: [react()],
      server: {
        port: 3000,
        proxy: {
          // Forward API calls to your Express backend
          '/api': {
            target: 'http://localhost:5000',
            changeOrigin: true,
          },
        },
      },
      build: {
        outDir: 'build', // keep 'build' so your Express static-serving code doesn't break
      },
    });

    That proxy block is essential for a MERN setup — it replaces CRA’s "proxy": "http://localhost:5000" line in package.json, letting your React dev server forward /api requests to your Express backend without CORS issues.

    Step 6: Update Environment Variables

    CRA required environment variables to be prefixed with REACT_APP_. Vite uses VITE_ instead, and you access them via import.meta.env instead of process.env.

    Before (CRA):

    const apiUrl = process.env.REACT_APP_API_URL;

    After (Vite):

    const apiUrl = import.meta.env.VITE_API_URL;

    Update your .env file accordingly:

    VITE_API_URL=http://localhost:5000/api

    Search your entire codebase for process.env.REACT_APP_ and process.env.NODE_ENV, and replace them, NODE_ENV becomes import.meta.env.MODE in Vite.

    Step 7: Fix Static Asset Imports

    Vite handles static assets slightly differently than Webpack/CRA:

    • SVGs imported as React components need the vite-plugin-svgr package if you were using ReactComponent imports.
    • Assets in public/ are referenced with an absolute path (/logo.png), not %PUBLIC_URL%/logo.png.
    npm install vite-plugin-svgr --save-dev
    // vite.config.js
    import svgr from 'vite-plugin-svgr';
    
    export default defineConfig({
      plugins: [react(), svgr()],
      // ...
    });

    Step 8: Update package.json Scripts

    Replace your CRA scripts:

    "scripts": {
      "dev": "vite",
      "build": "vite build",
      "preview": "vite preview"
    }

    Remove "proxy" from package.json — it’s now handled inside vite.config.js.

    Step 9: Update Jest/Testing Setup (If Applicable)

    CRA bundled Jest by default. Vite doesn’t, so if you have existing tests, migrate to Vitest, which shares Vite’s config and is nearly a drop-in replacement:

    npm install vitest @testing-library/react @testing-library/jest-dom --save-dev
    // vite.config.js
    export default defineConfig({
      test: {
        environment: 'jsdom',
        globals: true,
      },
    });

    Step 10: Test Everything

    Run the dev server and check off this list:

    • App loads without console errors
    • Hot reload works when you edit a component
    • API calls to your Express backend succeed (check the /api proxy)
    • Environment variables resolve correctly
    • Images, fonts, and SVGs render properly
    • Production build (npm run build) completes and serves correctly via Express
    npm run dev

    Then test a production build:

    npm run build
    npm run preview

    Step 11: Update Express to Serve the Vite Build

    If your Express server serves the React build as static files, no changes are needed as long as you kept outDir: 'build' in vite.config.js:

    app.use(express.static(path.join(__dirname, '../client/build')));
    
    app.get('*', (req, res) => {
      res.sendFile(path.join(__dirname, '../client/build', 'index.html'));
    });

    Common Migration Errors and Fixes

    ErrorCauseFix
    process is not definedprocess is not definedReplace with import.meta.env
    Blank page on loadindex.html not at project root, or wrong script pathMove index.html, verify src="/src/main.jsx"
    JSX syntax error.js file contains JSXRename to .jsx
    CORS errors calling APIMissing proxy configAdd server.proxy in vite.config.js
    SVG imports breakCRA’s SVGR behavior not replicatedInstall and configure vite-plugin-svgr

    Final Thoughts

    Migrating from CRA to Vite typically takes a few hours for a mid-sized MERN app, and the payoff is immediate: faster local development, quicker CI builds, and a tool that’s actively maintained. Since CRA is no longer recommended by the React team, this isn’t just a performance upgrade, it’s a necessary move for any MERN project you plan to maintain long-term.

    If you’re working on a larger app with many components, migrate incrementally: get the dev server running first, then tackle environment variables, then static assets, then testing, committing after each working stage.


    Have questions about migrating your own MERN project, or want help auditing your app before the switch? Get in touch through hasnainalam.com.

  • Sending Push Notifications from Express.js with Firebase Admin SDK

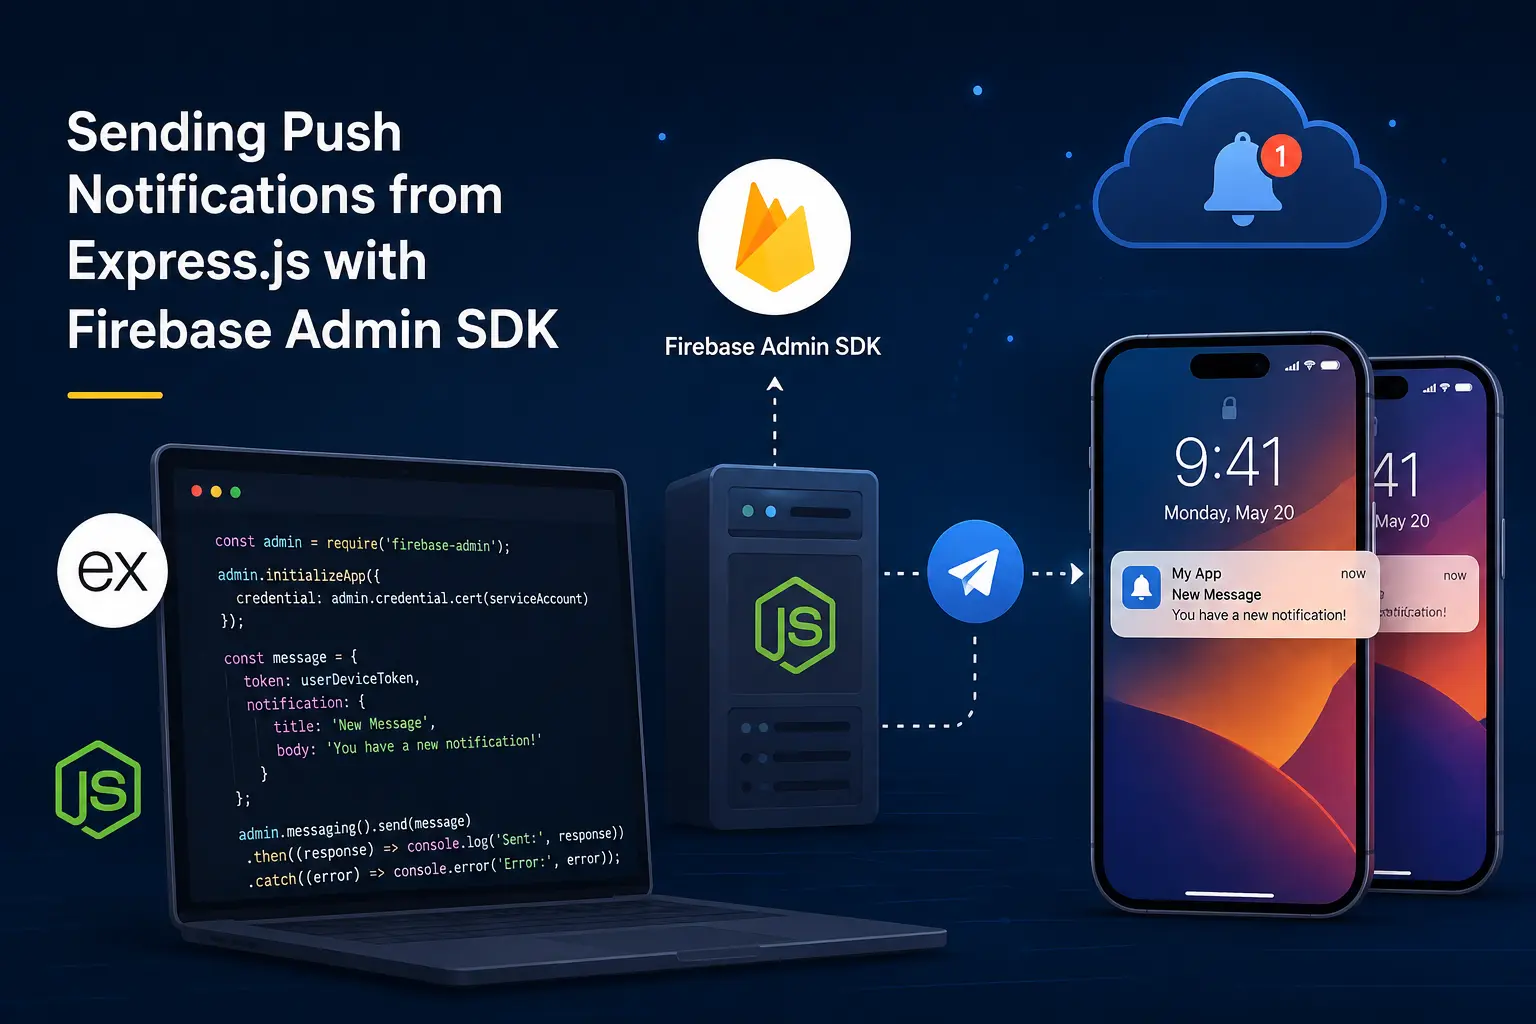
    Sending Push Notifications from Express.js with Firebase Admin SDK

    A practical guide on setting up your Express.js backend to send push notifications through Firebase Cloud Messaging, from the admin SDK setup to writing the actual send function.

    If you read my last post on setting up Firebase Cloud Messaging in React Native, you already know how to get a device ready to receive notifications. But that is only one side of the equation. A phone sitting there with a token isn’t going to notify anyone by itself. Something has to actually send the message. That something, in most of my projects, is an Express.js backend.

    This part is honestly a lot less painful than the mobile side. There’s no Gradle, no missing JSON files, no red screen of death. Once you have your service account key from Firebase, you’re basically 15 minutes away from sending your first test notification.

    What you need before you start

    Before writing any code, go to your Firebase Console, open your project settings, and go to the Service Accounts tab. From there, generate a new private key. This downloads a JSON file with your credentials. Do not commit this file to git. I’ve seen people push it by accident and it’s not a fun cleanup.

    You’ll need three values out of that file:

    • project_id

    I keep all three in a .env file rather than reading the JSON file directly, mostly because it plays nicer with how I deploy things. If you’re on a platform like Render or Railway, you’ll be pasting these into environment variables anyway, so it’s the same workflow either way.

    Installing the admin SDK

    You only need one package for this:

    npm install firebase-admin

    No extra dependencies, no messing around with different SDKs for different platforms. The same firebase-admin package handles Android and iOS tokens.

    Initializing the app

    This part trips people up more than it should, mostly because of one small detail: the private key. When you copy it from the .env file, the line breaks get turned into the literal characters \n instead of actual newlines. If you pass it to Firebase like that, initialization will fail with a vague error about invalid credentials. The fix is a simple .replace() call.

    Here’s how I set it up:

    javascript

    require("dotenv").config();
    var admin = require("firebase-admin");
    
    admin.initializeApp({
      credential: admin.credential.cert({
        projectId: process.env.PROJECT_ID,
        privateKey: process.env.PRIVATE_KEY?.replace(/\\n/g, "\n"),
        clientEmail: process.env.CLIENT_EMAIL,
      }),
    });

    That ?.replace(/\\n/g, “\n”) line is doing the real work here. Without it, you’ll spend way more time debugging than the actual problem deserves. I learned this one the hard way after staring at a “failed to parse private key” error for way longer than I’d like to admit.

    Writing the send function

    Once the app is initialized, sending a notification is just a matter of building a message object and calling admin.messaging().send(). The message needs a notification object with a title and body, an optional data object for anything extra you want the app to handle on its own, and the device token you got from the frontend.

    javascript

    const sendTestPushNotification = async ({ title, body, data, fcm_token }) => {
      try {
        const message = {
          notification: {
            title,
            body,
          },
          data: data,
          token: fcm_token,
        };
    
        await admin.messaging().send(message);
      } catch (error) {}
    };

    A few things worth pointing out here. The data field is separate from notification on purpose. Anything inside notification is what shows up in the notification tray automatically, handled by the OS. The data field is for values your app needs internally, like a screen to navigate to or an ID to fetch. Also, data values have to be strings. If you try passing a number or an object directly, Firebase will throw an error, so stringify anything that isn’t already a string.

    The fcm_token is the piece that connects this whole thing back to the React Native setup. Whatever device you want to notify, that’s the token you save from that side and pass in here.

    Where this token actually comes from

    In a real app, you’re not going to hardcode a token for testing forever. The usual flow looks like this: the app requests the FCM token on launch, sends it to your backend, and your backend saves it against that user in the database. Then whenever you need to notify that user, you just look up their saved token and call the send function above.

    One thing to keep in mind, and I mentioned this in the React Native post too, tokens are not permanent. They refresh, sometimes for no obvious reason. So don’t just save it once and forget about it. Make sure your app updates the saved token whenever it changes, otherwise you’ll end up sending notifications into a void and wondering why your open rates dropped.

    A basic error handling note

    The example above has an empty catch block, which is fine for quick testing but you shouldn’t ship it like that. In a real backend, you’d want to at least log the error, and ideally check if the failure was because the token is no longer registered. Firebase will tell you when a token is invalid or expired, and that’s your cue to remove it from your database so you’re not repeatedly trying to send to a dead address.

    Wrapping up

    That’s really the whole loop. The React Native side handles getting permission and grabbing a token. The Express.js side takes that token and turns it into an actual notification on someone’s phone. Neither half is particularly complicated once you’ve done it once, but the small details, like that private key formatting, are usually what eat up your time the first time around.

    If you haven’t already, it’s worth reading through the React Native setup guide first if you’re building this end to end. Once both pieces are in place, sending notifications becomes a pretty small function call away.

  • How to Connect MongoDB with Node.js using Mongoose

    How to Connect MongoDB with Node.js using Mongoose

    If you’re building a backend app with Node.js, at some point you’ll need a database to store your data. MongoDB is one of the most popular choices for this, especially when you’re working with JavaScript on both the frontend and backend. But connecting MongoDB directly with Node.js can get messy. That’s where Mongoose comes in.

    Mongoose is a library that sits between your Node.js app and MongoDB. It makes things much easier by giving you a simple way to define your data structure and talk to the database. In this post, I’ll walk you through the whole process step by step.

    What is Mongoose

    Mongoose is an ODM, which stands for Object Data Modeling. In simple words, it lets you create models for your data (like a User model or a Post model) and it handles all the communication with MongoDB behind the scenes. Instead of writing raw database queries, you get clean and readable functions.


    Step 1: Set Up Your Project

    First, create a new folder for your project and open it in your terminal. Then run this command to start a Node.js project:

    This will create a package.json file for you.

    Step 2: Install Mongoose

    Now install Mongoose using npm:

    That’s it. No extra setup needed. Mongoose is ready to use once it’s installed.

    Step 3: Get Your MongoDB Connection String

    Before connecting, you need a MongoDB database. You have two options here:

    • Use MongoDB Atlas (cloud version, free tier available)
    • Use MongoDB locally on your computer

    If you’re just starting out, MongoDB Atlas is the easier option. Just create a free account, set up a cluster, and copy your connection string. It will look something like this:

    Step 4: Connect to MongoDB

    Now create a file called server.js (or index.js, whatever you prefer) and write this code:

    Replace your-connection-string-here with the actual connection string from your MongoDB Atlas dashboard. Run this file with node server.js and if everything is correct, you’ll see “Connected to MongoDB” printed in your terminal.

    Step 5: Create a Schema and Model

    This is where Mongoose really shines. A schema defines the shape of your data. Let’s say we’re building a simple user system:

    The schema tells Mongoose what fields your data will have and what type each field should be. The model is what you’ll actually use to create, read, update, and delete data.

    Step 6: Save Data to the Database

    Once your model is ready, you can save new data like this:

    Step 7: Fetch Data from the Database

    To get data back, you can use the find method:

    This will return all the users stored in your database.

    Common Mistakes to Avoid

    While connecting MongoDB with Node.js, beginners often face a few issues. Here are some things to watch out for:

    • Make sure your IP address is whitelisted in MongoDB Atlas, otherwise the connection will fail
    • Double check your username and password in the connection string
    • Don’t forget to handle errors using try-catch or .catch(), so your app doesn’t crash silently
    • Keep your connection string in a .env file instead of writing it directly in your code, for better security

  • Getting Started with Firebase Cloud Messaging in React Native

    Getting Started with Firebase Cloud Messaging in React Native

    The first hurdle is always the config

    I still remember the first time I tried to add push notifications to a React Native project. It was about four years ago, and I thought it would be a quick afternoon task. I was very wrong. Between the Gradle sync errors and the missing JSON files, I spent way more time debugging my environment than actually writing code. But honestly, once you get the foundation right, the rest of the MERN stack integration feels like a breeze.

    The setup you actually need

    Before you even touch your Javascript files, you have to get the native side talking to Firebase. You’ll need to head over to the Firebase Console, create a project, and download that google-services.json for Android. It goes into your android/app folder. If you miss this, the app will just crash on startup with a cryptic error that doesn’t tell you much. For the library, I always stick with @react-native-firebase/app and @react-native-firebase/messaging. They are the industry standard for a reason.

    // First, install the core and messaging modules
    // npm install @react-native-firebase/app @react-native-firebase/messaging
    
    import messaging from '@react-native-firebase/messaging';
    
    async function requestUserPermission() {
      const authStatus = await messaging().requestPermission();
      const enabled =
        authStatus === messaging.AuthorizationStatus.AUTHORIZED ||
        authStatus === messaging.AuthorizationStatus.PROVISIONAL;
    
      if (enabled) {
        console.log('Authorization status:', authStatus);
      }
    }

    Getting that device token

    The most important part of this whole process is getting the FCM token. Think of this as the mailing address for that specific phone. You’ll want to grab this token and send it to your backend. In my MERN setups, I usually store this in a User schema in MongoDB. But here is a tip I learned the hard way. Tokens can change. They expire or get refreshed when an app is restored on a new device. So you should always listen for token refreshes using the onTokenRefresh method. If you don’t do this, you’ll end up sending notifications to dead addresses, and your delivery rates will tank.

    Setting this up is basically the rite of passage for mobile developers. It feels tedious when you’re doing it, but seeing that first notification pop up on your physical device makes it all worth it. Don’t let the initial setup frustrate you. We’ve all been there, staring at a red screen of death because of a typo in the build.gradle file. Stick with it, and once the bridge is built, the real fun begins.

    Now that your app can receive notifications, the next step is actually sending them. I wrote a separate guide on setting up the backend side with Express.js and Firebase Admin SDK, covering the service account setup and a working send function. You can read it here if you want to complete the full loop.

    Hasnain Alam, Full-Stack Developer | hasnainalam.com